Now take another length of 2x2; measure and mark at 12 inches long. Cut and repeat once.
 These two twelve-inch long 2 x 2 pieces will become the bottom of the U-shaped frame. Using your cordless drill and a #8 drill bit, drill two pilot holes about 3/4-inch from each end and centered on the 2x2 (see picture, above, for placement visual).
 |
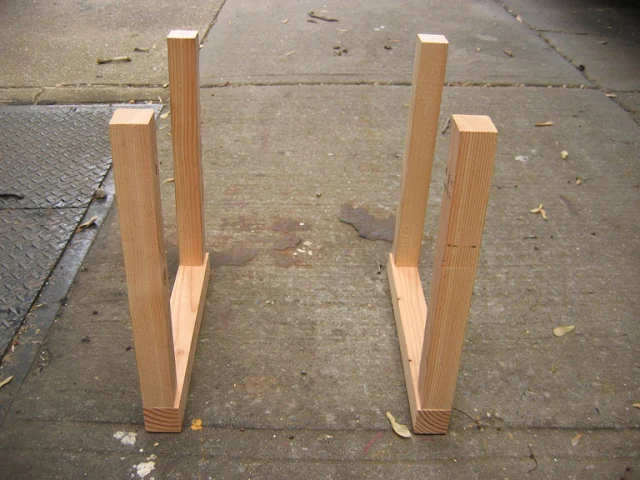
A completed "U" shaped framing member.
|
Afterward, line up two previously cut 14 inch posts in the fashion you see in the picture, above. Before attaching, lay "U" on its side to continue the pilot holes into the vertical arms of the "U." Make sure to keep the post and bottom pieces lined up while drilling. Now, drive one 3-inch long star-drive screw through each of the two holes on the the bottom 2 x 2 into the posts.
*Note that in the above picture you can see that the bottom piece is 3/16 inch wider than the 2x2 verticals —this is because I used a scrap 2x4, cut in half, for the bottom. This won't be an issue when using a store bought 2x2x8 for all of the framing.
 |
| Two "U" shaped interior frame members anchor the entire planter box. |
|
You will repeat this step for the other "U" shaped frame that will be opposite the other inside the finished planter box. Now you are ready for the plank sides.
 |
The old rule always stands: Measure twice, cut once.
|
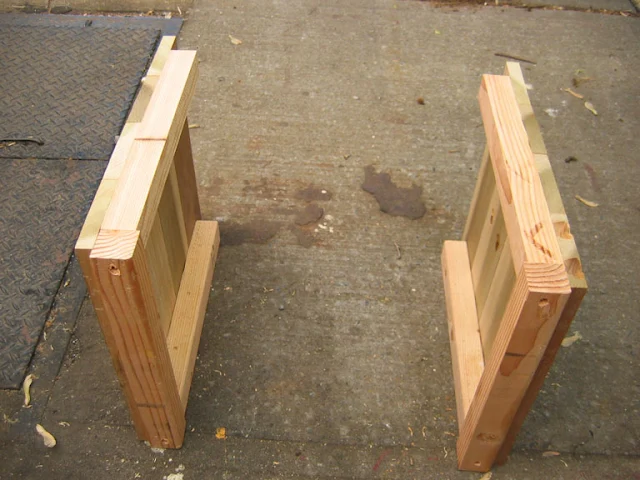
I decided to make a 12x16 inch planter box, so I now need to cut four 12-inch planks for each of two planter sides. Take a board, cut one end to square (90 degrees) and then measure, from this fresh cut end, to 12 inches. Mark and cut square. The planks should fit exactly on the "U" shaped frame, sitting flush with the members' edge. The planks I am using are 3.75 inches wide, so that I needed four planks, stacked side by side, to rise from near the bottom of the "U" frame to the top of its 14 inch tall members. The total height of the planters will be 15.5 inches tall.
 |
Notice the exposed 1/2 inch of the bottom of the "U" shaped frame.
|
In the above image, I have four planks lined up nicely, if imperfectly, on the frame and an additional four planks for the opposite frame. I wasn't too concerned with the final appearance —these were scrap wood boxes after all. Since these planks are 3.75 inches wide, a stack of four comes to a height of 15 inches. The 2x2 verticals posts are 14 inches tall, plus the bottom horizontal member is 1-1/2 inch thick, making the "U" shaped frame a total of 15-1/2 inches. 15-1/2 inches minus 15 inches allows for a 1/2 inch reveal of the frame at the bottom.
 Here
you can see the edge of one of my planks. It has some unnecessary holes, but none
too big to concern myself with. Drill two pilot holes (in the picture,
it's the smaller one near the corner) per plank edge so that you don't split the plank
when you drive screws through. The pilot holes should be set 3/4 inch from the cut edge to ensure the screws center on the 2x2 post. Each plank needs two pilot holes per side, so that four screws hold the plank in place. Feel free to measure accurately to line up the screws nicely or care not at all and eyeball it!
Once you have the pilot holes driven, you can then line the planks up with the "U" shaped frame. Hold each plank in place and drive a #8 star-drive screw through the plank and into the 2x2 frame, beneath. Be careful to ensure the planks are flush with the edges and well-aligned up the frame. If need be, you can lever the vertical 2x2 a bit to line it up with the planking —but only lever the 2x2 if you are sure planks are all measured equally and are flush with each other. If planks are cut accurately, there shouldn't be a need for more than an 1/16th of levering, if at all. It's also possible to loosen the bottom U-frame screw a bit to make that levering easier. I reiterate, however, that this shouldn't be necessary when measured and cut accurately.

This image shows (almost all) the 1-1/2 inch #8 star-drive screws driven through the planks into the "U" shaped frame. Repeat this for the opposite side. The star-drive screws should sink easily, so that they sit flush in any soft wood. Hardwoods may require a countersink, like this one, to carve out a recess for the screw head, so that it sits flush.

Here, both "U" shaped frames have been "planked." You will determine the length and width of your planter box, but I decided on a rectilinear shape of 12 x 16 inches. In the above picture, you can see that the second set of planks will overlap the short-side plank edges. This means that the pilot holes you will drill into the next set of longer planks need to be set in an additional 3/4 inch (the thickness of the planks) from the cut ends.
 Measure, mark and cut 8 planks, each at 16 inches long, ensuring that all cut ends are square.
Above are four 16" planks laid over the completed short sides —the pilot holes are set 1-1/2 inches from the edge so that the screws sink into the center of the 2x2 framing. Feel free to line up pilot holes for a more polished look.
After
pilot holes are drilled, line up and flush the edges of each with the short sides. Sink a 1-1/2 inch star-drive screw through each pilot hole, into the framing beneath. Do this for each of the four planks; then do the opposite side of the planter. *Note that the illustration above isn't lined up just right, and in fact the planks are upside down. Just make sure to line things up well!
 With a good size pile of scrap wood, I made several boxes. However, some of my 2x2 scrap was a bit short. In the image above, you can see the "U" shaped framing 2x2s do not extend to the top. That's okay, it still works, but it also meant that I couldn't use two screws per side of the uppermost plank. Two screws are better than one in this case because, as dry wood gets wet, the upper plank warps outward. The moral of the story is to make sure your 2x2 length matches your planter box dimensions.

Now its time to place a bottom on this scrappy planter box. This is the most complicated part of the entire planter box building project, however, it is still pretty simple. You can do it!
 |
First, take a measurement of the planter box bottom interior.
|
Since the bottom planks will be rest on the 2x2 bottom framing, make sure to measure across the sides with 2x2 bottom framing. My planter box needed 14-1/2 inch lengths of plank.
After recording the bottom dimensions, measure, mark, and cut to length your planks. My remaining scrap wood planks did not add up, side by side, for a perfect fit, so I had to cut a small 1-1/2 inch width piece to make up the difference.
*Pro Tip: To avoid additional cutting when planking the bottom, consider the bottom plank board widths when deciding on the size of your planter box! Common store bought 1x4 boards are 3-1/2 inches wide —this requires that your short-side planter box dimensions be in multiples of 3.5. Therefore, the easiest short-side dimension could be 10-1/2 inches, 14 inches, 17-1/2 inches, and so on.
Place the bottom planks side by side and measure the width to ensure it will be a good fit when installed in the box. You'll notice that the 2x2 vertical framing is in the way of sliding the bottom planks into the box. Only the central plank(s) can go in, uncut. The exterior planks require cut corners to get around the 2x2 framing. How do we do this?
Pro Tip: Store bought dimensional
"stick" lumber will be smaller than the
named dimension (this does not apply to "sheet" lumber, like plywood). If you haven't already noticed, a store-bought 2x2 is about 1-1/2 x 1-1/2 inches. This is due to lumber mill practices —the 2x2 was cut "green," meaning it was fresh, wet wood and, as it dried, it shrank to about 1-1/2 x 1-1/2 inches. Sometimes you will find 1-3/8 or 1-5/8 inch sides, so measure your 2x2 to figure out how much you need to cut out for the bottom planks.
There are several tools you can use to cut out the corner area -but whatever you choose, don't try to do it on the power miter saw! I like to use a Japanese pull saw, like this one. There are also several saws that mimic the Japanese pull saw that will also work. Another option is to choose a Jig Saw, like this one. In a pinch, you could give a traditional European hand saw or even a coping saw. Any saw that will allow you to safely cut with the grain (aka "ripping" along the length and parallel to the grain) and against the grain (aka crosscut, perpendicular to the grain) will work.
 |
From the top, looking down, you can see the corner cuts made to fit the bottom planks.
|
Measure and mark the corner cutout —in
my case 1-1/2 x 1-1/2 inches. Using a square and any marking tool, draw
out the corner to be cut to help guide your cutting. The cuts don't
need to be perfect, just to fit —after all, it will be covered in soil! Once these cuts are made, slide the outer planks down into the box. You can screw the planks down to the bottom frame or just allow gravity to do the work. Drill a few 1/2 inch drainage holes. If you wish, you may attach additional 2x2 pieces for increased bottom plank support, but I didn't feel it was necessary for a scrappy box.

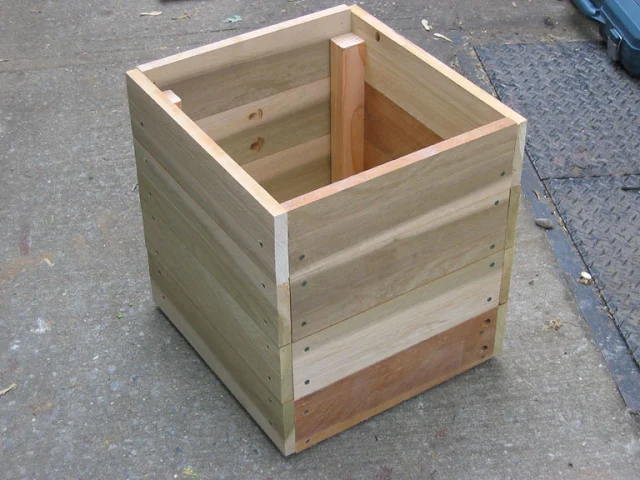
And here is the finished planter box. This is easiest, but scrappiest, box I could make. There are many ways to improve fit and finish, but the basic construction technique can be the same.
An improvement to this box, above, would be to bring the 2x2 posts all the way up to the top. Another would be to use the same species of wood for the sides! Certainly you could use your square to line up the screws for a more uniform look and could also match the screw color to the wood species color (the screws I used were intended to match green, treated lumber).
Resist the temptation to use smaller, trim screws for the side planking -the heads are too small to resist the outward forces wet/dry wood expansion and contraction. If you want to clean up the look, consider purchasing 1x2 cedar/pine/other species, cut to the height and attached to the corners with trim screws —make sure to avoid driving the trim screw into the head of the plank screws underneath. You will only need 8 trim screws on each corner.
Finally, you could add a top plate made of 1x4. This requires 2x2 framing along the interior, top edge to anchor the top plate trim screws. If so desired, 1x2 trim pieces can be cut to fit on the underside, exterior of the top plate. Whatever you do, do not miter-cut, at 45 degrees, the corners of the top plate. These will shrink, warp, and pull apart in no time. Just do square, 90 degree cuts.
 Three finished planter boxes in poplar, redwood, and pine.
I intended to make functional, scrappy boxes on the cheap, and in many cases you get what you pay for. These, however, will be vegetable planter boxes that few will see. I also made them on my Brooklyn sidewalk with an extension cord hanging out my window. It's not always possible to find a woodworking shop, right?
There are several ways you can modify this simple design —it's entirely up to you! Cedar posts and planking will make a longer-lasting
planter. Professionals often use treated lumber for framing and bottoms, using only the more expensive lumber for the sides and trim —this choice depends on your end use (I avoid treated for vegetables). You can plank your boxes vertically, although you will
need to change the "U" shaped frame on each side to a square 2 x 2
frame, with one frame at the bottom and the other at the top.
A few things to note if you are planting vegetables like tomatoes, peppers, eggplant and others:
- Deeper is better so that the roots have room to spread out, especially for tomatoes.
- I filled my box with pure compost, but also added some moisture-holding potting mix
- Planter soil, especially in exposed sunny, windy sites, or on hardscape, can dry rapidly.
- My mixture was roughly 60% compost, 40% potting mix.
- Make sure to check often so that your vegetables aren't stressed by dry soil.
- Consider adding drip irrigation if you have access to water spigot.
- Plants, like tomatoes, will send roots into ground soil if you place the pot on soil.
Since 2007, this blog has provided valuable information and
entertainment without the use of ads or any other commercial enterprise.
As of January 1, 2025, some of my blog posts will have links to
products that I have personally used and found helpful for completing
projects. I would not suggest, nor link to, a product that I did not find
helpful, useful, or otherwise high quality for its intended purpose. If
you have found a post helpful and would like to purchase a suggested
tool, book, or other product, please consider clicking through the
Amazon Affiliate linked product. If you do, you will support the creation of even more
informative posts. Thank you! This post contains links to Amazon: As an Amazon Associate, I earn from qualifying purchases. For lack of click-through purchases, Amazon booted this blog from the program.
 Of course, you'll need some tools: tape measure, pencil, drill, drill bits, a chop saw (or good pull-saw), and some 1-1/2 inch and 3 inch screws. A carpenter's square is useful too. I don't recommend an air compressor and nail gun as this kind of construction is best with exterior-rated, star-drive screws. Screws are simply superior for holding wood together in outdoor environments.
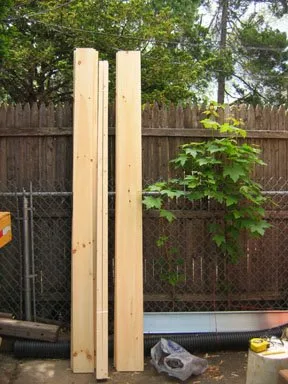
 I needed four 2 x 2 x 14 inch posts for the interior framing. Square the 2x2 by cutting a small slice off the end —make sure to remove any staples that might be holding a tag in place. Then measure (twice), mark and cut (once) each 2x2 at 14 inches long. It is important that your cuts are square (90 degrees) so that each post sits squarely on the bottom your planter box. You can check for square using one of many kinds of carpenter squares —I like this one.
 These two twelve-inch long 2 x 2 pieces will become the bottom of the U-shaped frame. Using your cordless drill and a #8 drill bit, drill two pilot holes about 3/4-inch from each end and centered on the 2x2 (see picture, above, for placement visual).


 Here
you can see the edge of one of my planks. It has some unnecessary holes, but none
too big to concern myself with. Drill two pilot holes (in the picture,
it's the smaller one near the corner) per plank edge so that you don't split the plank
when you drive screws through. The pilot holes should be set 3/4 inch from the cut edge to ensure the screws center on the 2x2 post. Each plank needs two pilot holes per side, so that four screws hold the plank in place. Feel free to measure accurately to line up the screws nicely or care not at all and eyeball it!
 With a good size pile of scrap wood, I made several boxes. However, some of my 2x2 scrap was a bit short. In the image above, you can see the "U" shaped framing 2x2s do not extend to the top. That's okay, it still works, but it also meant that I couldn't use two screws per side of the uppermost plank. Two screws are better than one in this case because, as dry wood gets wet, the upper plank warps outward. The moral of the story is to make sure your 2x2 length matches your planter box dimensions.


I'm just wondering, the thickness of your planks? About an inch?
ReplyDeleteThe planks look like 1x4's, so the thickness of the plant is under an inch.
ReplyDeleteGreat DIY guide! These wooden planters are simple yet stylish—perfect for any garden space. Love how approachable and budget-friendly your ideas are. Can’t wait to try one myself!
ReplyDeleteGarden Bed Construction in Georgetown